# 微信小程序商城构建全栈应用(七)
本文主要介绍了微信支付服务端接口的编写和订单相关接口的编写 ,因为微信不提供个人开发微信支付的相关功能,因此这里只是模拟微信支付流程来编写相关业务逻辑。
微信支付代码编写本身并不难,主要是将工作流程理清,下图是一个简单的流程图,相关支付的具体详情见官方文档 (opens new window)。

# 下单相关参数检测
这里我们新建一个 Pay 控制器,因为微信支付功能只能给用户使用,而不能让管理员支付,因此这里需要进行权限校验。
// v1/Pay.php
class Pay extends BaseController
{
    protected $beforeActionList=[
        'checkExclusionScope' => ['only'=>'getPreOrder']
    ];
    // 获取订单号
    public function getPreOrder($id=""){
        (new IDMustBePositiveInt())->goCheck();
    }
}
2
3
4
5
6
7
8
9
10
11
然后定义路由:
Route::post('api/:version/pay/pay_order','api/:version.Pay/getPreOrder');
由于支付的流程较为复杂,因此我们将相关业务代码下载service/Pay.php中。注意要将一个复杂的方法分隔成许多个小方法。
class Pay
{
    // 订单主键id
    private $orderID;
    private $orderNO;
    public function __construct($orderID)
    {
        if(!$orderID){
            throw new Exception('订单号不允许为NULL');
        }
        $this->orderID = $orderID;
    }
    public function pay()
    {}
}
2
3
4
5
6
7
8
9
10
11
12
13
14
15
同时在调用微信服务器接口进行支付之前,我们还需要进行库存量检测,因为用户可能下单之后过了一段时间在进行支付。因为之前已经在service/Order.php中编写了检测库存状态的方法getOrderStatus,但要注意传递相关参数,因此我们需要编写一个对外公开库存量检测的方法。
// service/Order.php
// 对外公开库存量检测方法
public function checkOrderStock($orderID)
{
    // 根据订单号获取下单相关信息  product_id ,count
    $oProducts = OrderProduct::where('order_id','=',$orderID)->select();
    $this->oProducts = $oProducts;
    // 根据下单相关信息获取库存信息
    $this->products = $this->getProductsByOrder($oProducts);
    $status = $this->getOrderStatus();
    return $status;
}
2
3
4
5
6
7
8
9
10
11
12
这时我们就可以在service/Pay中调用库存量检测方法,同时对客户端传递的唯一订单 ID 不仅要判断库存量不足的情况,还要进行以下情况的检测。
- 订单号可能不存在(在控制器中执行进行了基本变量类型的检测,而没有进行业务逻辑的检测)
- 订单号存在,但是订单号和当前用户不匹配
- 订单可能已经被支付
- 库存量检测
首先检测最有可能发生的情况,一旦不通过检测 ,后续程序就不会执行,以节约服务器性能。其次是将最消耗服务器性能的检测尽量放到后面执行。
因此我们需要在service/Pay.php中进行订单检测相关信息是否合法,在检查用户是否匹配时,我们将其检测方法写在service/Token.php中,供其他地方检测时调用,具体代码如下:
// service/Pay.php
public function pay(){
    $this->checkOrderValidate();
    // 进行库存量检测
    $orderService = new OrderService();
    $status = $orderService->checkOrderStock($this->orderID);
    if(!$status['pass']){
    	return $status;
    }
}
// 检测订单是否符合业务逻辑
private function checkOrderValidate(){
// 查询当前订单号的相关信息
    $order = OrderModel::where('id','=',$this->orderID)->find();
    // 如果订单不存在
    if(!$order) {
        throw new OrderException();
    }
    // 查看是否与当前用户匹配
    if(!Token::isValidOperate($order->user_id)){
        throw new TokenException([
        'msg'=>'订单与用户不匹配',
        'errorCode'=>10003
        ]);
    }
    // 检测订单是否已经被支付
    if($order->status != OrderStatusEnum::UNPAID){
        throw new OrderException([
            'msg'=>'该笔订单已被支付',
            'errorCode' => 80003,
            'code' => 400
        ]);
    }
    $this->orderNO = $order->order_no;
    return true;
}
2
3
4
5
6
7
8
9
10
11
12
13
14
15
16
17
18
19
20
21
22
23
24
25
26
27
28
29
30
31
32
33
34
35
36
检测当前用户操作是否合法:
// service/Token.php
// 检测当前操作是否合法,如订单号的用户id和当前令牌里的uid是否相等
public static function isValidOperate($checkUID){
    if(!$checkUID){
    	throw new Exception('检查UID时必须传入一个被检查的UID');
    }
    $uid = self::getCurrentUid();
    if($uid == $checkUID){
    	return true;
    }
    return false;
}
2
3
4
5
6
7
8
9
10
11
12
订单状态相关信息单独存到enum/OrderStatusEnum.php文件中
class OrderStatusEnum
{
    //待支付
    const UNPAID =1;
    // 已支付
    const PAID = 2;
    // 已发货
    const DELIVERED = 3;
    // 已支付,但库存量不足
    const PAID_BUT_OUT_OFF = 4;
}
2
3
4
5
6
7
8
9
10
11
# 调用微信支付
上面我们已经完成支付订单的相关检测,这时候就需要调用微信服务器进行支付了,首先我们要将预订单发送到微信服务器,这里需要下载使用微信官方的 SDK (opens new window),方便封装相关参数。
# 微信预下单
注意:微信官方的 SDK 直接进行调用可能会出现部分问题,需要我们在业务中进行相关的修改。
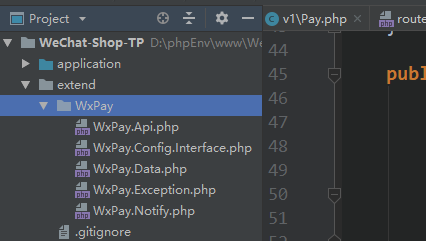
将下载 SDK 中lib文件下的类库复制到项目文件夹下的/extend/WxPay目录中。
因为微信的 SDK 文件不属于 TP5 框架的文件,没有命名空间,因此不能像平常文件通过use来引入该文件,因此这里使用手动加载相关文件。我们可以使用 TP5 框架的 Loader 类中的import方法进行引入外部文件。
use think\Loader;
// extend/WxPay/WxPay.WxPay.Api.php
Loader::import('WxPay.WxPay',EXTEND_PATH,'.Api.php');
2
3
**注意:**在未修改EXTEND_PATH这个常量时,extend文件夹下的相关文件如果存在命名空间,那么都可以被自动加载。
因为微信 SDK 类库文件中的配置文件是一个abstract类,因此我们需要编写一个类去继承并重写其中所有的方法。
// extend/WxPay/WxPayConfig.php
<?php
/**
 * 	配置账号信息
 */
require_once 'WxPay.Config.Interface.php';
require_once  "Config.php";
class WxPayConfig extends WxPayConfigInterface{
    //=======【基本信息设置】=======
    public function GetAppId()
    {
        return Config::APPID;
    }
    public function GetMerchantId()
    {
        return Config::MCHID;
    }
    //=======【支付相关配置:支付成功回调地址/签名方式】======
    public function GetNotifyUrl()
    {
        return "";
    }
    public function GetSignType()
    {
        return "HMAC-SHA256";
    }
    //=======【curl代理设置】===========
    public function GetProxy(&$proxyHost, &$proxyPort)
    {
        $proxyHost = "0.0.0.0";
        $proxyPort = 0;
    }
    //=======【上报信息配置】===========
    public function GetReportLevenl()
    {
        return 1;
    }
    //=======【商户密钥信息-需要业务方继承】========
    public function GetKey()
    {
        return Config::KEY;
    }
    public function GetAppSecret()
    {
        return Config::APPSECRET;
    }
    //=======【证书路径设置-需要业务方继承】========
    public function GetSSLCertPath(&$sslCertPath, &$sslKeyPath)
    {
        $sslCertPath = '../cert/apiclient_cert.pem';
        $sslKeyPath = '../cert/apiclient_key.pem';
    }
}
2
3
4
5
6
7
8
9
10
11
12
13
14
15
16
17
18
19
20
21
22
23
24
25
26
27
28
29
30
31
32
33
34
35
36
37
38
39
40
41
42
43
44
45
46
47
48
49
50
51
52
53
并将APPID等相关信息,单独存放在WxPay/Config.php文件中
class Config {
    const APPID = 'your appid';
    const MCHID = 'your mech id';
    const KEY = 'your mech key';
    const APPSECRET = 'your appsecret';
}
2
3
4
5
6
在完成上述步骤之后,我们需要向微信预下单,封装相关下单参数:
// service/Pay.php 微信预下单
    private function makeWxPreOrder($totalPrice)
    {
        $openid = Token::getCurrentTokenVar('openid');
        if(!$openid){
            throw new TokenException();
        }

        $wxOrderData = new \WxPayUnifiedOrder();
        // 设置订单号
        $wxOrderData->SetOut_trade_no($this->orderNO);
        //设置交易类型
        $wxOrderData->SetTrade_type('JSAPI');
        // 设置交易金额 单位为分
        $wxOrderData->SetTotal_fee($totalPrice*100);
        // 设置订单描述
        $wxOrderData->SetBody('零食商贩');
        // 设置用户身份标识
        $wxOrderData->SetOpenid($openid);
        // 设置回调地址 这里需要编写方法来接受小程序返回的回调地址
        $wxOrderData->SetNotify_url("");
    }
2
3
4
5
6
7
8
9
10
11
12
13
14
15
16
17
18
19
20
21
22
在封装完相关预订单参数之后,我们需要调用微信的预定单接口,从而获得微信服务器端返回的签名,注意这里实例化的WxPayConfig就是我们自己编写的微信支付信息配置文件,这里同样需要进行引入。除了上面所说的Loader类中的方法引入外,我们还可以使用require_once进行文件的引入:
require_once(EXTEND_PATH.'WxPay'.DS.'WxPay.Config.php');
private function getPaySignature($wxOrderData){
        $config = new \WxPayConfig();
        // 向微信统一下单
        $wxOrder = \WxPayApi::unifiedOrder($config, $wxOrderData);
        // 判断接口是否调用成功
        if($wxOrder['return_code']!='SUCCESS' ||
            $wxOrder['result_code'] != 'SUCCESS')
        {// 记录日志
            Log::record($wxOrder, 'error');
            Log::record('获取预支付订单失败','error');
            throw new Exception('获取预支付订单失败,'.$wxOrder['err_code_des']);
        }
    }
2
3
4
5
6
7
8
9
10
11
12
13
14
这里我们先进行以下调试,看微信预订单接口是否能否走通。首先先将相关信息返回:
// service/Pay.php
public function pay(){
	// ...
	 return $this->makeWxPreOrder($status['orderPrice']);
}
// 微信预下单
private function makeWxPreOrder($totalPrice){
    // ...
    return $this->getPaySignature($wxOrderData);
}
private function getPaySignature($wxOrderData){
    // ...
    return null;// 暂时先返回空字符串
}
// v1/Order.php
// 获取订单号
public function getPreOrder($id=""){
    (new IDMustBePositiveInt())->goCheck();
    $pay = new PayService($id);
    return $pay->pay();
}
2
3
4
5
6
7
8
9
10
11
12
13
14
15
16
17
18
19
20
21
同时因为我们只是在本地进行相关测试,因此还需将微信 API 类中的相关 curl 参数验证设置为 false。
curl_setopt($ch,CURLOPT_SSL_VERIFYPEER,false);
curl_setopt($ch,CURLOPT_SSL_VERIFYHOST,false);//严格校验
2
在微信小程序上调用支付方法,调试可以发现报如下错误:
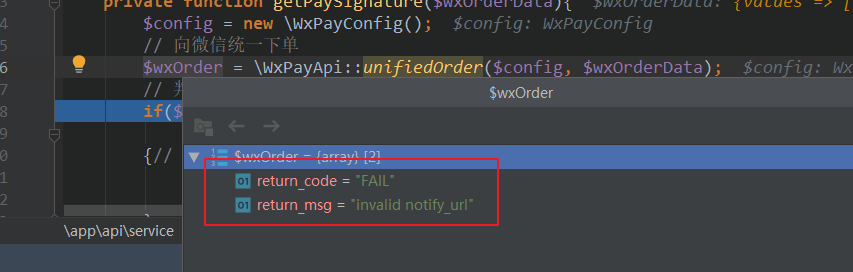
这是因为我们之前没有编写获取回调地址的方法,于是将此值设置为了空,我们这里随便填写一个地址继续测试:
$wxOrderData->SetNotify_url("https://www.baidu.com");
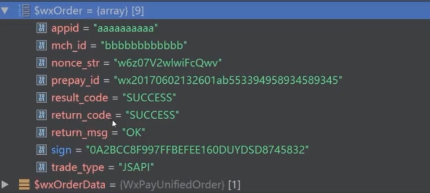
返回结果如上所示,就说明我们的预下单已经成功。其中prepay_id可以用来向用户推送相关模板消息。
# 生成签名及微信回调处理
# 生成签名
在完成微信预下单之后,我们需要将prepay_id保存到数据库,方便后期调用。
// service/Pay.php
// 保存prepay_id
private function recordPrepayID($wxOrder){
    OrderModel::where('id','=',$this->orderID)
    ->update(['prepay_id'=>$wxOrder['prepay_id']]);
}
2
3
4
5
6
然后我们需要返回一系列参数至客户端,由客户端去吊起微信支付,相关详细信息见文档 (opens new window)。其中需要我们返回一个签名字段。其抽象如下,因为相关订单参数在传递的过程种可能会被篡改,因此需要使用签名。但没有完全保证参数不被篡改地方法。签名是通过参数加 APPkey 通过一定的算法生成,当客户端将算法和参数一起传递到微信服务端时,微信服务端同样通过算法生成签名,与客户端的签名进行对比,进行判断。

这里我们编写获取吊起微信支付参数的方法并返回至客户端。
// service/Pay.php
// 生成支付数据的签名及相关支付参数
private function sign($wxOrder){
    $jsApiPayData = new \WxPayJsApiPay();
    // 相关参数文档 https://pay.weixin.qq.com/wiki/doc/api/wxa/wxa_api.php?chapter=7_7&index=3
    $jsApiPayData->SetAppid(config('ex.app_id'));
    $jsApiPayData->SetTimeStamp(string(time()));
    // 生成随机串
    $rand = md5(time().mt_rand(0,1000));
    $jsApiPayData->SetTimeStamp($rand);

    $jsApiPayData->SetPackage('prepay_id='.$wxOrder['prepay_id']);
    $jsApiPayData->SetSignType('MD5');
    // 微信封装的生成sign方法
    $sign = $jsApiPayData->MakeSign();
    // 获取参数数组
    $rawValues = $jsApiPayData->GetValues();
    // 将生成的签名添加到数组中
    $rawValues['paySign'] = $sign;
    // 因为数组中还携带appid 而客户端并不用appid这个参数
    // 而且有些时候我们也不希望返回这个参数,因袭我们将其删除
    unset($rawValues['appId']);
    return $rawValues;
}
 // 获取签名
private function getPaySignature($wxOrderData){
	// ...
    $this->recordPrepayID($wxOrder);
    $signature = $this->sign($wxOrder);
    return $signature;
}
2
3
4
5
6
7
8
9
10
11
12
13
14
15
16
17
18
19
20
21
22
23
24
25
26
27
28
29
30
31
小程序根据服务器返回的结果拉起微信支付,微信会分别返回给客户端和服务器一个支付的结果(异步)通知。
# 回调处理
我们先编写收到回调的处理方法并定义相关路由供微信访问:
// v1/Pay.php
// 获取支付通知
public function receiveNotify()
{
// 通知频率为15/15/30/180/1800/1800/1800/3600
// 只有返回正确的处理消息或者超时才会停止访问
}
// route.php
Route::post('api/:version/pay/notify','api/:version.Pay/receiveNotify');
2
3
4
5
6
7
8
9
当服务端收到微信通知时需要做以下三件事:
- 检测库存量,超卖
- 更新这个订单的 status 状态
- 减库存
如果成功处理以上步骤,需要给微信返回成功处理的消息,那么微信就会停止调用接口,如果没有成功处理,则会继续调用接口。
微信支付回调接口有以下两个特点:
- post形式访问,且不能使用路由传参的形式
- 返回 xml 格式,使用微信自带的 SDK 中
WxPay.Notify.php提供了相关的方法将其转换为相关数组
这里需要我们覆盖入口方法,支付回到成功返回的参数见官方文档 (opens new window)。
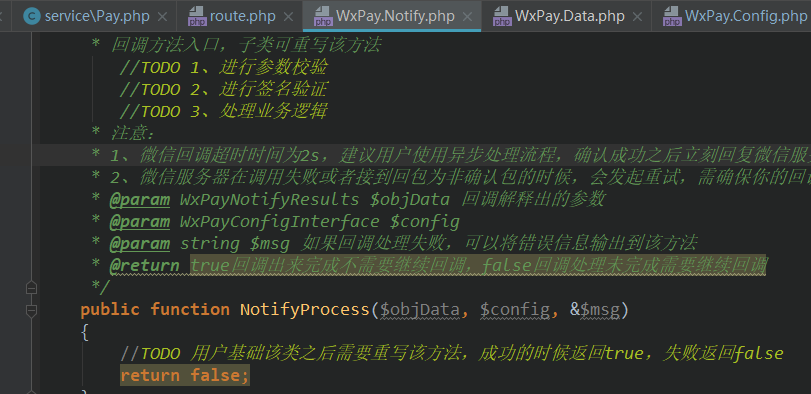
然后我们新建一个类并重写该方法:
namespace app\api\service;
Loader::import('WxPay.WxPay',EXTEND_PATH,'.notify.php');
class WxNotify extends \WxPayNotify
{
    public function NotifyProcess($objData, $config, &$msg)
    {
        if($objData['result_code'] == 'SUCCESS')
        {
            $orderNo = $objData['trade_order_no'];
            try
            {
                $order = OrderModel::where('order_no','=',$orderNo)
                    ->find();
                if($order->status == 1)
                {
                    $orderService = new OrderService();
                    $stockStatus = $orderService->checkOrderStock($order->id);
                    if($stockStatus['pass'])
                    { // 库存量检测成功
                        // 更新订单状态
                        $this->updateStatus($order->id, true);
                        // 减少库存
                        $this->reduceStock($stockStatus);
                    }
                    else
                    {
                        $this->updateStatus($order->id,false);
                    }
                }
                return true;
            }
            catch(Exception $e)
            {
                Log::error($e);// 错误信息记录日志
                return false;
            }
        }
        else
        { // 订单支付失败,返回true,让微信不在调用通知接口
            return true;
        }
    }

    // 更新订单状态
    private function updateStatus($orderID, $success) {
        $status = $success ? OrderStatusEnum::PAID
            : OrderStatusEnum::PAID_BUT_OUT_OFF;
        OrderModel::where('id','=',$orderID)
            ->update(['status'=>$status]);
    }
    // 减少库存
    private function reduceStock($stockStatus){
        // 订单商品状态信息
        foreach ($stockStatus['pStatusArray'] as $singlePStatus){
            Product::where('id','=',$singlePStatus['id'])
                ->setDec('stock',$singlePStatus['count']);
        }
    }
}
2
3
4
5
6
7
8
9
10
11
12
13
14
15
16
17
18
19
20
21
22
23
24
25
26
27
28
29
30
31
32
33
34
35
36
37
38
39
40
41
42
43
44
45
46
47
48
49
50
51
52
53
54
55
56
57
58
59
注意,这里检测库存量及后面的操作时,是在数据库中订单尚未支付的情况下进行检测及后续操作,否则每次微信调用接口,都会进行这一系列操作是不合理的。
# 事务与锁防止多次减库存
在上述回调重写过程中,是有可能产生多次减库存的操作。例如,当第一次回调时,在进行库存量的检测还没有修改订单状态的时候,查询数据库的过程比较慢,导致下一次回调的时候,还没有修改订单的状态,这时候就会导致多次减库存的发生。
因此我们在这里可以使用事务操作,在第一次通过 OrderModel 查询订单信息的时候将表锁住,直至事务操作完成,才可以进行下一次的操作。
Db::startTrans();
try
{// ...
    Db::commit();
    return true;
}
catch(Exception $e)
{// ...
	Db::rollback();
}
2
3
4
5
6
7
8
9
10
如果需要对于单独的数据库操作,我们可以单独对其加锁如下所示:
$order = OrderModel::where('order_no','=',$orderNo)
	->lock(true)
	->find();
2
3
然后我们在Pay控制器中编写接收微信回调的方法:
require_once(EXTEND_PATH.'WxPay'.DS.'WxPay.Config.php');
// 获取支付通知
    public function receiveNotify()
    {
        // 通知频率为15/15/30/180/1800/1800/1800/3600
        // 只有返回正确的处理消息就会停止访问
        //1. 检测库存量,超卖
        //2. 更新这个订单的 status 状态
        //3. 减库存
        $config = new \WxPayConfig();
        $notify = new WxNotify();
        $notify->Handle($config);
    }
2
3
4
5
6
7
8
9
10
11
12
13
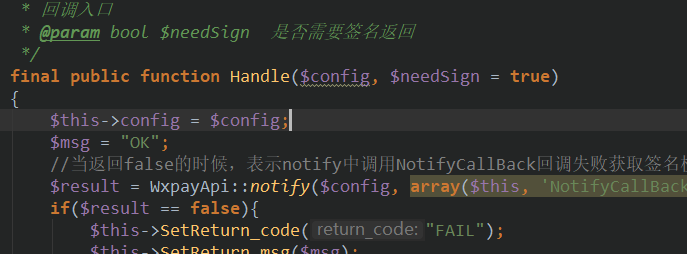
这里没有直接调用WxNotify中的重写的NotifyProcess方法,是因为其需要接收三个参数,而这三个参数是在父类Handle处理方法中获取并自行调用NotifyProcess方法,并且Handle方法会将微信返回的xml格式信息转换为数组格式进行处理。
此时我们还要设置微信支付的回调地址,使微信服务器能正确调用我们的回调方法:
// extra/secure.php
return [
    'pay_back_url'=>'http://wxtp.io/api/v1/pay/notify'
];
// service/Pay.php
public function makeWxPreOrder{
     // 设置回调地址 这里需要编写方法来接受小程序返回的回调地址
     $wxOrderData->SetNotify_url(config('secure.pay_back_url'));
}
2
3
4
5
6
7
8
9
但是我们是本地服务器,并不能直接供微信服务器回调,因此需要反向代理软件 Ngrok (opens new window),间接的将本地服务器转换为网上服务器。但是这种方法不安全,因此最好使用阿里云等部署代码。
这里我们使用内网穿透的地址如下:
'pay_back_url'=>'http://bf91b369.ngrok.io/WeChat-Shop-TP/api/v1/pay/notify'
# 支付流程测试
这里我们首先使用 Postman 对回调接口进行测试,会出现以下报错。

这里是我们直接在service/WxNotify.php中引入了WxPay.Notify.php文件,实际上必须通过WxPay.Api.php文件进行间接引用,因此需要进行如下修改
namespace app\api\service;
Loader::import('WxPay.WxPay',EXTEND_PATH,'.Api.php');
2
并在WxPay.Api.php文件中引入WxPay.Notify.php文件。
require_once "WxPay.Notify.php";
再次请求,如果报如下错误就说明已经可以正常进行微信回到了,因此我们可以通过微信进行完整的下单测试了。

如果只针对回调进行 Debug 调试的话,需要我们进行转发接口的编写,因为微信服务器会自动忽略路由传递的参数。将微信预下单返回的参数获取,然后再通过转发接口访问即可进行回调调试。
// 获取支付通知
    public function receiveNotify()
    {
        $xmlData = file_get_contents('php://input');
        $result = curl_post_raw('http://wxtp.io/api/v1/pay/re_notify',$xmlData);
    }

    // 回调转发接口
    public function redirectNotify()
    {
        // 通知频率为15/15/30/180/1800/1800/1800/3600
        // 只有返回正确的处理消息就会停止访问
        //1. 检测库存量,超卖
        //2. 更新这个订单的 status 状态
        //3. 减库存
        $config = new \WxPayConfig();
        $notify = new WxNotify();
        $notify->Handle($config);
    }
2
3
4
5
6
7
8
9
10
11
12
13
14
15
16
17
18
19
接口地址编写
Route::post('api/:version/pay/re_notify','api/:version.Pay/redirect');
编写 post 请求的公共方法
// api/common.php
function curl_post_raw($url, $rawData)
{
    $ch = curl_init();
    curl_setopt($ch, CURLOPT_URL, $url);
    curl_setopt($ch, CURLOPT_HEADER, 0);
    curl_setopt($ch, CURLOPT_RETURNTRANSFER, 1);
    curl_setopt($ch, CURLOPT_CONNECTTIMEOUT, 10);
    curl_setopt($ch, CURLOPT_POST, 1);
    curl_setopt($ch, CURLOPT_SSL_VERIFYPEER, false);
    curl_setopt($ch, CURLOPT_POSTFIELDS, $rawData);
    curl_setopt(
        $ch, CURLOPT_HTTPHEADER,
        array(
            'Content-Type: text' // 这里微信返回的是xml格式的文本,因此设置为text
        )
    );
    $data = curl_exec($ch);
    curl_close($ch);
    return ($data);
}
2
3
4
5
6
7
8
9
10
11
12
13
14
15
16
17
18
19
20
21
# 我的订单编写
用户在查询历史订单时,要按购买时间继续排序,并且由于一个人的历史订单可能有很多条,因此需要进行分页处理。
页面如下所示:

然后在v1/Order.php控制器中编写获取用户的历史订单信息方法:
// 前置方法
  protected $beforeActionList = [
      'checkExclusionScope' => ['only'=> 'placeOrder'],
      'checkPrimaryScope' => ['only'=>'getSummaryByUser']
  ];
// 获取用户的简要订单信息 管理员也可以查看用户的订单信息
public function getSummaryByUser($page=1, $size=15)
{
    (new PagingParameter())->goCheck();
    $uid = TokenService::getCurrentUid();
    $pagingOrders = OrderModel::getSummaryByuser($uid, $page, $size);
    if($pagingOrders->isEmpty())
    {
        return json([
            'data'=>[],
            'current_page'=>$pagingOrders->getCurrentPage()
        ]);
    }
    $data = $pagingOrders ->hidden(['snap_item','snap_address','prepay_id'])->toArray();
    return json([
        'data'=>$data,
        'current_page'=>$pagingOrders->getCurrentPage()
    ]);
}
2
3
4
5
6
7
8
9
10
11
12
13
14
15
16
17
18
19
20
21
22
23
24
其对应的路由、验证器和模型方法的编写:
// 路由
Route::get('api/:version/order/by_user','api/:version.Order/getSummaryByUser');
// model/Order.php
 public static function getSummaryByuser($uid, $page, $size)
 {
     $pageData = self::where('user_id','=',$uid)
         ->order('create_time desc')
         ->paginate($size, true, ['page'=>$page]);
     return $pageData;
 }
// 验证器
namespace app\validate;
class PagingParameter extends BaseValidate
{
    protected $rule = [
        'page' => 'isPositiveInt',
        'size' => 'isPositiveInt'
    ];
    protected $message = [
        'page' => '分页参数必须是正整数',
        'size' => '分页参数必须是正整数'
    ];
}
2
3
4
5
6
7
8
9
10
11
12
13
14
15
16
17
18
19
20
21
22
23
# 订单详情编写
这里我们根据订单号获取订单详情,而管理员也应该具有该权限,因此编写方法如下:
// 前置方法
protected $beforeActionList = [
    'checkExclusionScope' => ['only'=> 'placeOrder'],
    'checkPrimaryScope' => ['only'=>'getDetail,getSummaryByUser']
];
// 获取订单详情
public function getDetail($id){
    (new IDMustBePositiveInt())->goCheck();
    $orderDetail = OrderModel::get($id);
    if(!$orderDetail){
    	throw new OrderException();
    }
   	return json($orderDetail->hidden(['prepay_id']));
}
2
3
4
5
6
7
8
9
10
11
12
13
14
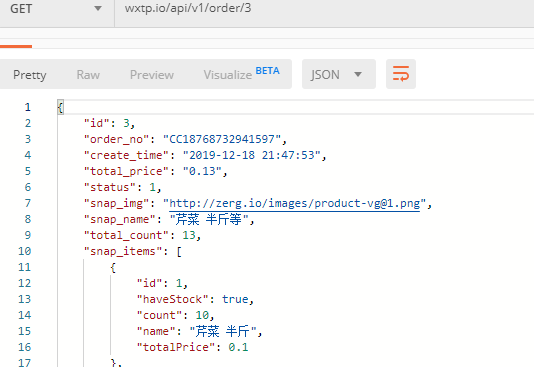
编写了该方法,定义路由如下,然后进行测试:
Route::get('api/:version/order/:id','api/:version.Order/getDetail',[],['id'=>'\d+'])
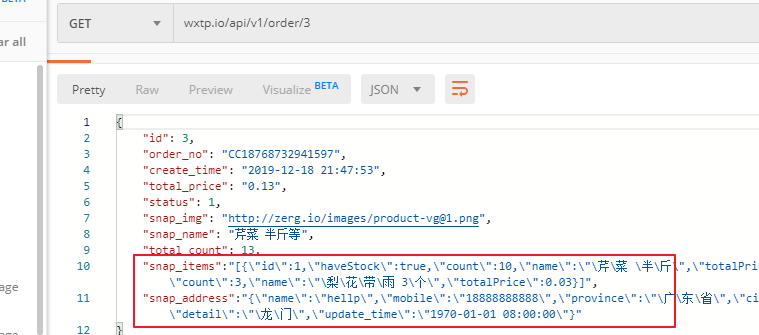
根据返回的结果我们可以看到 snap_items 和 snap_address 是 JSON 字符串,这个是不符合接口要求的,因为正常接口应该返回 JSON 对象,所以我们需要在模型中编写相关读取器的方法,使其返回正确的格式。
public function getSnapItemsAttr($value)
{
    if(empty($value)){
   		return null;
    }
    return json_decode($value);
}
public function getSnapAddressAttr($value)
{
    if(empty($value)){
    	return null;
    }
    return json_decode($value);
}
2
3
4
5
6
7
8
9
10
11
12
13
14
这时返回的结果如下图所示: